背景
WebSocket
HTTP 协议是一种无状态的、无连接的、单向的应用层协议。它采用了请求/响应模型。通信请求只能由客户端发起,服务端对请求做出应答处理。
这种通信模型有一个弊端:HTTP 协议无法实现服务器主动向客户端发起消息。
这种单向请求的特点,注定了如果服务器有连续的状态变化,客户端要获知就非常麻烦。大多数 Web 应用程序将通过频繁的异步 JavaScript 和 XML(AJAX)请求实现长轮询。轮询的效率低,非常浪费资源(因为必须不停连接,或者 HTTP 连接始终打开)。
WebSocket 就是这样发明的。WebSocket 连接允许客户端和服务器之间进行全双工通信,以便任一方都可以通过建立的连接将数据推送到另一端。WebSocket 只需要建立一次连接,就可以一直保持连接状态。这相比于轮询方式的不停建立连接显然效率要大大提高。
实现
SpringBoot集成
首先在pom文件中引入依赖
1
2
3
4
| <dependency>
<groupId>org.springframework.boot</groupId>
<artifactId>spring-boot-starter-websocket</artifactId>
</dependency>
|
然后新建一个WebSocket的配置类,用来开启WebSocket的支持
1
2
3
4
5
6
7
8
9
10
11
12
| import org.springframework.context.annotation.Bean;
import org.springframework.context.annotation.Configuration;
import org.springframework.web.socket.server.standard.ServerEndpointExporter;
@Configuration
public class WebSocketConfig {
@Bean
public ServerEndpointExporter serverEndpointExporter(){
return new ServerEndpointExporter();
}
}
|
然后新建一个客户端实体类WebSocketClient用来存储连接的Session和Uri
1
2
3
4
5
6
7
8
9
10
11
12
13
14
15
16
17
18
19
20
21
22
23
24
25
| import javax.websocket.Session;
public class WebSocketClient {
private Session session;
private String uri;
public Session getSession() {
return session;
}
public void setSession(Session session) {
this.session = session;
}
public String getUri() {
return uri;
}
public void setUri(String uri) {
this.uri = uri;
}
}
|
然后新建WebSocketService,用来创建和处理连接
1
2
3
4
5
6
7
8
9
10
11
12
13
14
15
16
17
18
19
20
21
22
23
24
25
26
27
28
29
30
31
32
33
34
35
36
37
38
39
40
41
42
43
44
45
46
47
48
49
50
51
52
53
54
55
56
57
58
59
60
61
62
63
64
65
66
67
68
69
70
71
72
73
74
75
76
77
78
79
80
81
82
83
84
85
86
87
88
89
90
91
92
93
94
95
96
97
98
99
100
101
102
103
104
105
106
107
108
109
110
111
112
113
114
115
116
117
118
119
120
121
122
123
124
125
126
127
128
129
130
131
132
133
134
135
136
137
138
139
140
141
142
143
144
145
146
147
148
149
150
151
152
153
154
155
156
157
158
159
160
161
| import org.apache.commons.lang.StringUtils;
import org.slf4j.Logger;
import org.slf4j.LoggerFactory;
import org.springframework.stereotype.Component;
import javax.websocket.*;
import javax.websocket.server.PathParam;
import javax.websocket.server.ServerEndpoint;
import java.io.IOException;
import java.util.concurrent.ConcurrentHashMap;
@ServerEndpoint(value = "/websocket/{userName}")
@Component
public class WebSocketService {
private static final Logger log = LoggerFactory.getLogger(WebSocketService.class);
private static int onlineCount = 0;
private static ConcurrentHashMap<String, WebSocketClient> webSocketMap = new ConcurrentHashMap<>();
private Session session;
private String userName="";
@OnOpen
public void onOpen(Session session, @PathParam("userName") String userName) {
if(!webSocketMap.containsKey(userName))
{
addOnlineCount();
}
this.session = session;
this.userName= userName;
WebSocketClient client = new WebSocketClient();
client.setSession(session);
client.setUri(session.getRequestURI().toString());
webSocketMap.put(userName, client);
log.info("----------------------------------------------------------------------------");
log.info("用户连接:"+userName+",当前在线人数为:" + getOnlineCount());
try {
sendMessage("来自后台的反馈:连接成功");
} catch (IOException e) {
log.error("用户:"+userName+",网络异常!!!!!!");
}
}
@OnClose
public void onClose() {
if(webSocketMap.containsKey(userName)){
webSocketMap.remove(userName);
if(webSocketMap.size()>0)
{
subOnlineCount();
}
}
log.info("----------------------------------------------------------------------------");
log.info(userName+"用户退出,当前在线人数为:" + getOnlineCount());
}
@OnMessage
public void onMessage(String message, Session session) {
log.info("收到用户消息:"+userName+",报文:"+message);
if(StringUtils.isNotBlank(message)){
}
}
@OnError
public void onError(Session session, Throwable error) {
log.error("用户错误:"+this.userName+",原因:"+error.getMessage());
error.printStackTrace();
}
public void sendMessage(String message) throws IOException {
synchronized (session){
this.session.getBasicRemote().sendText(message);
}
}
public static void sendMessage(String userName,String message){
try {
WebSocketClient webSocketClient = webSocketMap.get(userName);
if(webSocketClient!=null){
webSocketClient.getSession().getBasicRemote().sendText(message);
}
} catch (IOException e) {
e.printStackTrace();
throw new RuntimeException(e.getMessage());
}
}
public static synchronized int getOnlineCount() {
return onlineCount;
}
public static synchronized void addOnlineCount() {
WebSocketService.onlineCount++;
}
public static synchronized void subOnlineCount() {
WebSocketService.onlineCount--;
}
public static void setOnlineCount(int onlineCount) {
WebSocketService.onlineCount = onlineCount;
}
public static ConcurrentHashMap<String, WebSocketClient> getWebSocketMap() {
return webSocketMap;
}
public static void setWebSocketMap(ConcurrentHashMap<String, WebSocketClient> webSocketMap) {
WebSocketService.webSocketMap = webSocketMap;
}
public Session getSession() {
return session;
}
public void setSession(Session session) {
this.session = session;
}
public String getUserName() {
return userName;
}
public void setUserName(String userName) {
this.userName = userName;
}
}
|
注意这里的引用的WebSocketClient是上面自己新建的用来存储连接相关信息的实体类
然后@ServerEndpoint(value = "/websocket/{userName}")
这里的就是WebSocket连接的地址,后面的{userName}是用来接收前端传递的参数,用作不同标识,进而做不同的处理
然后下面的OnOpen注解的方法是连接建立成功后调用的方法,这里做了用户在线数的计数处理,可以根据自己
的业务需要去处理。
然后OnClose注解的是连接关系调用的方法。
然后OnMessage注解的是客户端发来消息时的回调方法,里面根据自己需要去处理数据
sendMessage方法在客户端连接到服务器时使用当前会话来给客户端推送一个反馈消息
然后向指定客户端发送消息使用的是sendMessage方法,传递的是用户的唯一标识和消息内容
新建一个Controller接口用来测试消息的推送
1
2
3
4
5
6
7
8
9
10
11
12
13
14
15
16
17
| import com.ruoyi.web.websocket.WebSocketService;
import org.springframework.web.bind.annotation.GetMapping;
import org.springframework.web.bind.annotation.RequestMapping;
import org.springframework.web.bind.annotation.RestController;
@RestController
@RequestMapping("/websocket")
public class WebSocketController {
@GetMapping("/pushMessage")
public void pushMessage()
{
WebSocketService.sendMessage("Garfield","向上向善优良风气创未来");
}
}
|
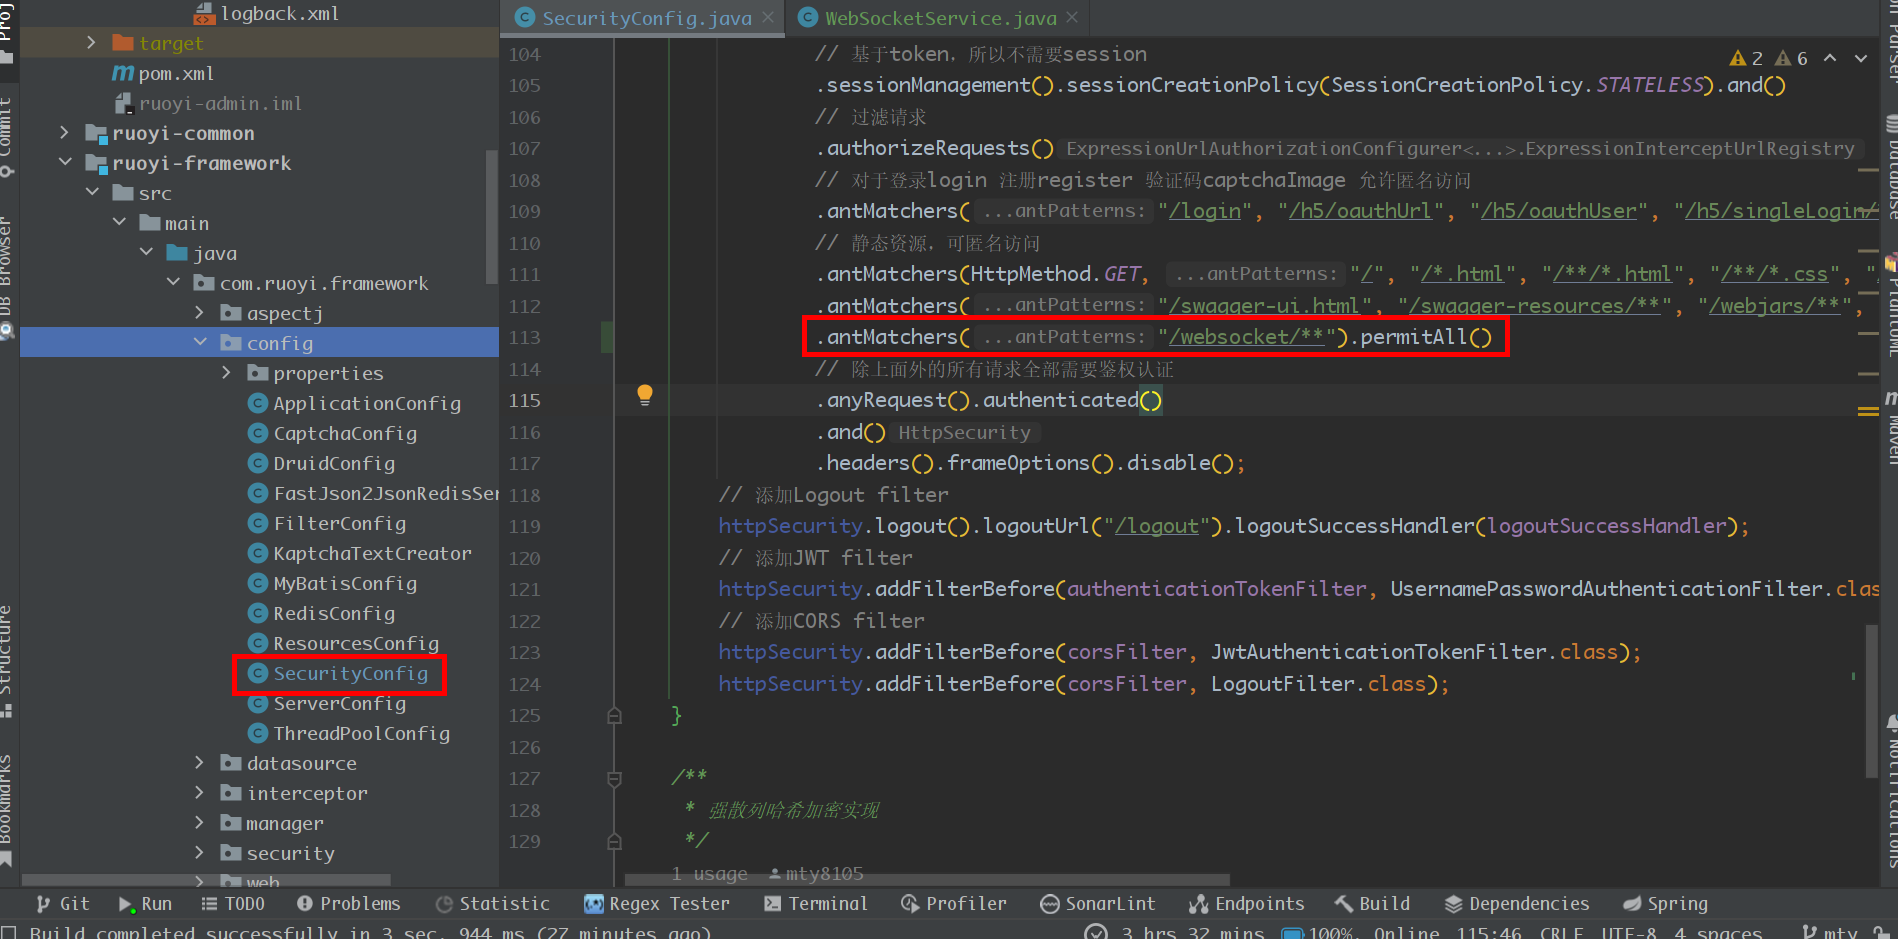
如果是普通的SpringBoot项目则后台到此就可以了,然后因为是使用上面若依搭建的框架,所以需要将ws的url和接口的url放开权限认证

Vue项目集成
新建一个WebSocket组件,放在componets目录下,完整的WebSocket组件代码
1
2
3
4
5
6
7
8
9
10
11
12
13
14
15
16
17
18
19
20
21
22
23
24
25
26
27
28
29
30
31
32
33
34
35
36
37
38
39
40
41
42
43
44
45
46
47
48
49
50
51
52
53
54
55
56
57
58
59
60
61
62
63
64
65
66
67
68
69
70
71
72
73
74
75
76
77
78
79
80
81
82
83
84
85
86
87
88
89
90
91
92
93
94
95
96
97
98
99
100
101
102
103
104
105
106
| <template>
<el-button @click="sendDataToServer" >给后台发送消息</el-button>
</template>
<script>
export default {
name: "WebSocket",
data() {
return {
wsIsRun: false,
webSocket: null,
ws: '',
wsTimer: null,
}
},
async mounted() {
this.wsIsRun = true
this.wsInit()
},
methods: {
sendDataToServer() {
if (this.webSocket.readyState === 1) {
this.webSocket.send('来自前端的数据')
} else {
throw Error('服务未连接')
}
},
/**
* 初始化ws
*/
wsInit() {
const wsuri = 'ws://10.229.36.158:7777/websocket/badao'
this.ws = wsuri
if (!this.wsIsRun) return
this.wsDestroy()
this.webSocket = new WebSocket(this.ws)
this.webSocket.addEventListener('open', this.wsOpenHanler)
this.webSocket.addEventListener('message', this.wsMessageHanler)
this.webSocket.addEventListener('error', this.wsErrorHanler)
this.webSocket.addEventListener('close', this.wsCloseHanler)
clearInterval(this.wsTimer)
this.wsTimer = setInterval(() => {
if (this.webSocket.readyState === 1) {
clearInterval(this.wsTimer)
} else {
console.log('ws建立连接失败')
this.wsInit()
}
}, 3000)
},
wsOpenHanler(event) {
console.log('ws建立连接成功')
},
wsMessageHanler(e) {
console.log('wsMessageHanler')
console.log(e)
},
/**
* ws通信发生错误
*/
wsErrorHanler(event) {
console.log(event, '通信发生错误')
this.wsInit()
},
/**
* ws关闭
*/
wsCloseHanler(event) {
console.log(event, 'ws关闭')
this.wsInit()
},
/**
* 销毁ws
*/
wsDestroy() {
if (this.webSocket !== null) {
this.webSocket.removeEventListener('open', this.wsOpenHanler)
this.webSocket.removeEventListener('message', this.wsMessageHanler)
this.webSocket.removeEventListener('error', this.wsErrorHanler)
this.webSocket.removeEventListener('close', this.wsCloseHanler)
this.webSocket.close()
this.webSocket = null
clearInterval(this.wsTimer)
}
},
}
}
</script>
<style scoped>
</style>
|
然后在自己的页面中引用该组件
1
2
3
4
5
6
7
8
9
10
11
12
13
14
15
| <template>
<div class="app-container home">
<el-row :gutter="20">
websocket推送
<WebSocket></WebSocket>
</el-row>
<el-divider />
</div>
</template>
import WebSocket from '@/components/WebSocket/WebSocket'
export default {
name: "index",
components: {
WebSocket
},
|
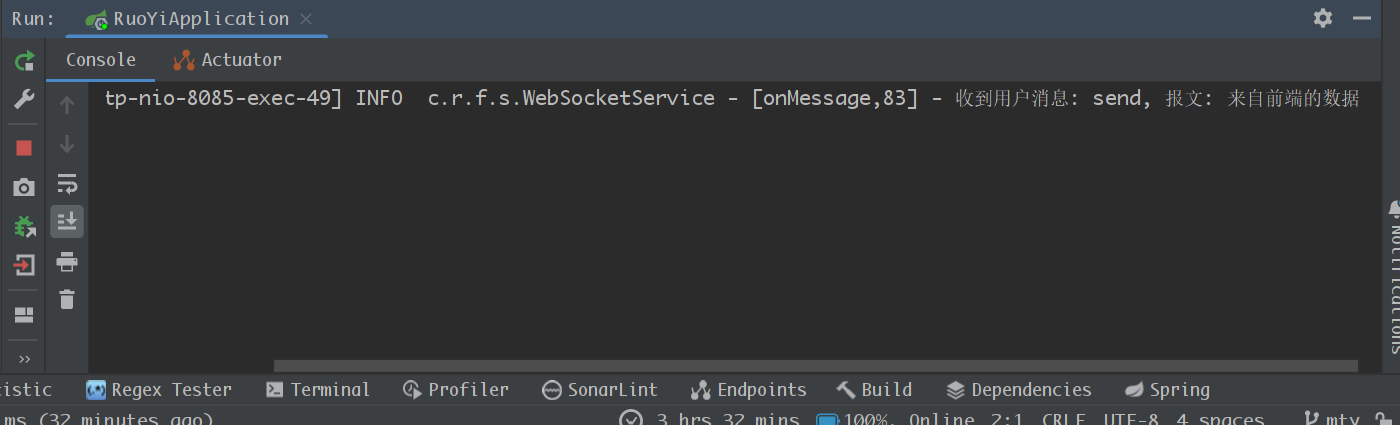
效果
点击前端发送按钮,在后台能看到消息